~~~~~~~~~~~~~~~~~~~~~~~~~~~~~~~~~~~~~~~~~~~~~~~~~~~~~~~~~~~~~~~

the whole point of this blog is to help others with all the questions they have about setting up a similar home climbing gym, and ramble about a variety of climbing related subjects.
There is a variety of subjects... most involving rock climbing, written about on this blog. MAKING VOLUMES OR CLIMBING HOLDS, is probably one of the more popular subjects. just check the labels links or search bar to find your fancy.
of course if you want to go back and start from the beggining, please do! to that end, if there are any question let me know ... i encourage you to add comments for others to read or if you want to get me directly you can email me at treadwallproject@hotmail.com
IF THIS IS YOUR FIRST TIME, READ THE MUST READ LIST.... oh!, ...and you have to fight!

Monday, May 24, 2010

Order Update!

so quick and easy! just talked to Garnet, place my order. i figured i would be putting this on my card over the phone, but i guess they prefer a check. a little odd as it seems to add a step but i can deal with it. so later today im gonna throw a check for $2000.00 in mail!

what else is there but to wait? Garnet made it sound like i have a six week wait rather than eight...

Apologies....

.....this might get uncomfortable for some of you. mostly because im going to make fun of you. A LOT! normally i hate blogs, they need a point and focus. this post completely deviates from my point. im not gonna mention the ...tr--d-all k-r- at all. nore are we gonna talk about anything practical. but i am gonna address some parts of climbing culture. but if this is your first visit to the this blog go read the other posts first... then come back to this for comic relief.

so...anyone who climbs regularly hits the crag and hears countless things being yelled repeatedly to inspire each other. GO!, You got it! Grab the PINCH!, i gotcha! Allez, Venga! ...GUMBA!(japanese?)

okay yeah youre annoying, but i can handle it to a degree. but there is this new archetype in my airspace. and i would describe them as annoying urban climbing, skate shoe wearin, upity mega-vegan dieting, tight jeans wearing, indie pop 80's revival music listening, anorexic BMI having, fakey dirt-bag lifestylin (we know you live with your parents and eat outa their frig.), so-ill worshipping (come 'on they arent that cool, plastic thumb? plastic teeth? giant tongue? we get jason kehl "youre wierd"), no history knowin ("john bachar died? who's that? did evolve sponsor him?), and one for pure hate sake.... douche bags. yeah i cant stand you guys. because the only reason you climb is cause your good today and that jerks off your ego. the climbing gym handed climbing to you but you have no actual sense of adventure beyond your "sick hard send" and no sense of the cultural history. i cant wait till you get an injury! seriously, i pee myself laughing every time one of you tells me you have a "tendon injury" cause you "over trained" something. alright, im getting off point but let me digress for just one last point:

when you talk $#!t about how strong you are, keep in mind that there are some of us at healthy body weights who dont want to hear it. sure you climb harder up there, your strength to weight is really good. but... on the ground i can kick the living $#!t out of you. no seriously, your 135lbs will fit nicely under my boot, ill hit a bi-otch. so run your mouth. i cant wait for you to annoy me enough so i can justify, to myself, cutting your rope in the middle ("oh, was that an 80m so you could do the link up in one pitch?") and then i stomp on your throat!

......WHEW! wow... i exorcised a few demons there! folks, i think were doing some good today.

What i really want to put a stop to though is this. your out at the wall and all i keep hearing lately is "GET PYSCHED!".... "COME ON! GET PYSCHED!" only they say it more like "get psyct". F*%K! it's annoying. i hear it at the walls, in different states, i heard it in the boulders in canada, bishop, the gyms. UGH! i cant handle these people anymore, youre dumb!


first off, lets start with simple evidence, if neil patrick harris will use a "saying" you know its bad americana. when was the last time he did anything that wasnt satirical?


Point number two, definitions. lets break down the roots of this annoying phrase.

the psyche: an ancient greek word meaning soul or mind. the seat of faculty and reason.

to pysch, pysching : to confused to cause derangement

pysched: emotionally excited


so we have the origin of the word, but that nothing like what your shouting at the wall right? its just where you got the spelling i guess. i doubt kids are asking their friend to: "Urban dictionary" version, which honestly seems like the opposite of what i want to do on a climb. "no stop your thinking, become confused!" yeah that's not right. finally i think we hit what your trying to say but... usually i try to focus, become clear with the moves. emotions can flip quickly and i want to control them. extreme emotions like "PSYCHED!" can become terror when you get run out or blow something. so shouldnt we tell our climbing partners to focus, ...use their head. but then again, most climbers today just dont know much in the first place.... so yeah, use that dumb emotional energy to gun for the top... its just about all ya got!


lastly i know i cant appeal to your sense of irony. or to your intelligence in this matter. but maybe i can appeal to your sense of cool? thats what its all about, right? well how about this guy...


is this dude really the "band wagon" you wanna hitch up to? yeah... i think that point is clear. yup two pictures movin on...

in closing, please quit climbing, please quit saying "THAT" ...or you could catch a rock in the head.


...see jesus will answer my prayers and smite your ass!

Sunday, May 23, 2010


okay it's not actually official... but tomorrow morning i make the call, give them my info for the down payment and no more than 8 weeks later i should get delivery of my very own TREADWALL KORE!! july 19th will be a very happy day... if not sooner!

Landfill

i havent post in a couple days.... which means i must have actually got something done. that being said your probably not too interested in this if your the average person.... but if your friend or family and know the state of my yard its kinda interesting just to see all the work ive been doing.

so the set up is... my back yard had been plagued with weeds and disarray. the yards landscaping is also multi tiered to the point of ridiculousness. also i used to have a concrete and fill dirt front porch, which then was smashed by my family and made into to piles in my back yard... rubble and dirt. so in trying to create more space in the yard for my treadwall, shed and bouldering wall ive have decided to make a little landfill. first i built a retaining wall out of all the biggest chunks of rubble, and then filled the hole with remaining smaller pieces of concrete.

this is the huge pile of dirt i have to move... unfortunately my wheel barrow is shot. cause i could have use a better one. i think ill hold off though and buy one after this guy fully dies. i just have a hard time wasting anything, why shoot the horse too soon?

well here it is mostly done. ultimately i have raised the ground level about 2ft to 3ft in an are roughly 8ft by 8ft. so what is that about 120 to 190 square feet of busting my ass? Look brewer's ledge!, this treadwall better be bad ass... or im gonna be pissed! ...just kiddin. check out the nearly done pics.... i still have another foot of earth to move .... yay!
oh, i watered it down pretty heavily to kinda help it settle and pack... how was i supposed to know it was gonna rain for the next two days. my B...

Thursday, May 20, 2010

The Shape & things to come

i figured it was time to show you a little more about actually shaping your own holds. its not that hard, it just takes a little practice. thats why i suggest you start simple and small. once you get the basics down then you can step it up and avoid making cost prohibitive mistakes. to start with you are gonna need some carving foam. its an easy medium to work with and has a great natural texture for climbing holds. the are plenty of different types of foam out there you can use, but an easy thing to get started with is floral foam. DRY FLORAL FOAM, the wet floral foam wont work it will be a disaster when you go make the rubber molds! you can find the dry foam at just about any craft store and its real cheap, therefore mistakes are easy on the wallet. but you can also find larger quantities for when you get to a place where your shaping bigger holds! ive been slowly whittling down a couple large blocks myself.


for the purpose of this posting i am gonna do a pre-designed hold. you can either start by drawing out your holdor just sculpt free form and see what you get. well, i looked at my holds and realized i was seriously deficient in the pocket hold department. the obvious reason for that is.. i hate pockets, they suck! which probably means i should be training on them... at least a little. so i wanted a nice big comfy pocket jug to add to my 5.9/.10a sets. so i drew my idea up on graph paper. notice the two different views. this is important as it will help me shape the hold. i dont try to put too much detail in this drawing, i shoot for a general shape and concept. once that is done i can cut out a template using an xacto knife.


i put the template up to my large block of foam and chop off the appropriately sized chunk. then i trace my templates onto my block. make sure you line up your traces or the whole point will be lost.


from here we start our shaping. there are a variety of tools you can use for this. my suggestion is that you get a set of clay working tools they work well on foam and are rather cheap (one of my other post show the nice set i got...about fifteen different tools in a black case. if you have one, an electric dremel tool also works great. so i started out here carving off the excess from my outlines. the knife im using is actually a letter opener, it works great and i dont risk stabbing myself.


following that i slowly work the piece with tools till it gets closer to what i imagined. for carving out the finger hole i opted to use this wire circlet. and to get more uniformed curves i use the wooden sculpting tool.


another great trick is to use your hand an fingers. you can act like a sander and slowly form the hold to the shape of your liking. i use this method often. it helps me make things more symmetrical and ergonomic. i had trouble taking a good video of this but here is the general idea.


so... um, yeah there is that. and after working the shape for a while i come down to something i like with this hold i created a dual purpose hold. on one side there is the pocket we were looking for and on the second side there is a nice sloper. i tried to make it so that the pocket isnt usable when the sloper is well positioned and vice verse. of course thats not perfect, but i do what i can. last but not least i like to add a little "flare" to the hold. for all my other holds of this series i put on a little design texture. it works for me, youll come up with your own likes and dislikes ...i guess.

anyway sometimes pictures dont do things justice so here are a couple of videos to give you a better look. as a bonus, in the video is another hold that i did on the fly when i got some ideas making the first designed holds. after this the only thing left to do is drill the bolt holes. but that will be on a future post. uh, stay tuned?....


Monday, May 17, 2010

TREADWALL~ coming soon to a back yard near...

OH! yeah im getting excited! making holds... making VOLUMES.... i had one of the vulgarians over the other day, tyler or "strong" as hes know around the bouldering cave. he aint that strong but it seems to fit him as nick names go. he gave me a hand doing some finish work on my new volumes... maybe you need another picture of those?
hes one of those contractor/construction type guys and he said hes gonna lend a hand when it comes time to break ground on the shed. thanks buddy! anyway... so i emailed Garnet today at Brewer's Ledge just to let him know how close we are. just waiting on that final approval from the "Landlord" to build the shed! cant see why this is a problem but hopefully on or around the 22nd of may i should be making the call. then as it stands it should take 4-6 weeks for delivery... boo, cant we speed that up to 2 weeks? oh well, it's my fault for not pushing the issue with the "roommate". but soon i will have a very similar setup to thiiiiissss.......

...of my very own. which has brought me to another very hypothetical question. i kinda like the wood framing of this individuals treadwall. i tend to love wood and more earthy feel of things.... guess thats why were into "nature" and stuff? anyway im gonna have to check it out when the wall arrives but i may try to enclose the metal legs in wood vernier. i know it seems a little ridiculous... but i said it's hypothetical. F'n'S! ...oh heres a Treadwall Kore again...

Saturday, May 15, 2010

Hold Bank

so here is a current collective picture of all my design masters (archives) and the molds. these are designs anyway, i have made several hundreds from these molds at this point. its pretty fun work!


here is what i have in my personal climbing set. unfortunately, i dont have a picture of all the holds ive ever made. some of my favorites are now the property of others. so obviously the shapes dont change.... but the color does! so lets look at the few examples of color creativity i do have.


so theses are basic coloring options. dyes are easy to add i showed you that when i talked about making holds. but the bi-color holds, those are a little different. you can do as many pours as you want. creating a multitude of pancaked layers of different colors. but one thing i suggest you keep in mind is that i have had two holds (out of hundreds) spilt along the color seam. i think this happened because i waited too long between pouring the different colors. so now i have two rules for pouring multi-color holds. first, i always pour the first color to the level were the bolt touches. this seems like a good idea, because in my mind i think the hold wont be as likely to spilt if the bolt is help to keep the seams together. second rule is, i always pour the different colors as quickly as possible. my thoughts being that if you wait around and let one color fully cure it wont bond as well to the next layer. since i have started these practices i havent had any holds break at the color seam.

**side note: i have yet to have any holds break because of the resin failing. other than the reasons stated above the only other failures i have had were due to making the hold too thin. honestly, i guess 1/8"inch just isnt strong enough for my fat ass?!


uh... moving on... here i want you to focus on the red holds mostly. this was done by selectively pouring into different areas of the mold. also, i changed the angle/level of the mold. rather than setting your mold on a flat level table you can tilt the mold and get some funky color patterns!


lastly, if you look at these three blue rails. each one i attempted something a little different. the middle hold i wasted some black from a different pour the poured blue on top.... kinda cool, better than straight blue. the right rail i made after the middle one and experimentd by putting drips into the mold first making a leopard print... sorta. then it has a third light blue base layer. last lets look at the left rail. in actuality this hold is considered to be a failure. i was trying to recreate how some of the bigger companies swirl colors. well, the blue has some swirling but right now i havent figured out how to fully mix the resin but not mix the different color. if you have any ideas im all ears?! come on, time for you guys to give back a little!

Get a Grip (part 2)

welcome back, last time we talked we had just poured our liquid resin into our rubber molds. notice how i imply dual ownership in this adventure. see thats a trick i learned to help the reader or "audience" to become more invested in the writing. that way you stay interested and keep coming back for more... its working right? ...right?!

Okay so we poured the resin and start the clock. it generally takes 5 min for the resin to harden enough for the hold to be taken out of the mold. i have heard though i dont know it to be true, that the resin will continue to harden over the next 24hours. if thats true i would avoid climbing on them for a day. but at the same time i have climbed on holds ive poured within a couple of hours out of the mold. regardless, the first 5 min is pretty cool to watch. check out what happens!


the liquid gets kinda hazy, then become more opaque.... pretty cool right?


and after 5 min the holds are completely solid! this is my favorite part, all that work; the shaping of the design, building & setting the molding box, pouring the silicone rubber and then cleaning & prepping the mold until finally one clean pour and you get to find out if you just made an awesome hold of an expensive piece of ass! dont worry ive had both happen, but at worst a crappy hold will make a foot hold... albeit a crappy foot hold.
so you want to be somewhere between gentle and forceful when removing your new hold. start at the outside edges and peel the rubber mold away. the rubber stretches which helps in the removal just dont take it too far because you can tear the mold. now there are also things you can do to make your demolding easier when you initially set up your mold box. first just pay good attention to the orientation of the foam original when you glue it down. because in-cut edges are the hardest part to remove from the mold and you should attempt to loosen the rest of the hold first. also when you glue the foam originals down try to position them in such a way that the in-cut are toward the center of the mold and the shallow areas, that are easier to demold, are oriented to the outside edges. this will ease your removal of the hold and it will increase the overall lifespan of your mold. the less you tug and stretch your mold the longer it will last, so plan ahead.


this is the final product. and the answer to the question? you decide... but i think they turned out pretty cool. i like the two crimps on the far right and the big juggy on at the top the best! after i stopped taking pictures i poured the two remaining holds. and i was rather happy with them as well. the one thing i would suggest is start simple. the first couple of detailed designs i made were over the top.

but were not quite done with these holds yet, check it out.


no matter what the holds always need to be finished. a simple sanding does the trick. hopefully you have access to a belt sander. just plain the hold down till its level and smooth. all of this will take time to refine the technique, so dont get too frustrated if it's not perfect from the start. check out the side by side comparison.


so when all was said and done i got these holds out of it. there are 29 holds in that picture. add to that the 12 archive holds i molded and it's quite a bit for the money. consider a normal set of 5 holds costs around $35-45 bucks and the resin cost me $90. sure the rubber was another added cost but i think it was worth it. Once last word of confidence for you if your think this process looks too difficult. take a look at the retarded pot smoking mega dirt bag losers who run half the hold companies out there, then look at the visionless uninspired mega companies that make up the other half. do you really think you cant do at least a decent job? i figure most people with half a brain can do this!
okay that's it... go away. what's that... archive hold? i never mentioned that? really? ah, well the molds slowly break down over time. the rubber wears out. but you can make an archive hold that never gets climbed on. this hold just sits in a box in case you want to remake a mold. generally i dont color them. the best time to archive i have found is the third pour. the first two clean all the foam out and any subsequent pours are losing quality of the mold. the company says the molds should last for about 40-60 pours. thats a lot of the same hold. but if you keep your designs generic enough you can have a lot of the same hold. also you can prolong the life of the mold by avoiding letting it dry out. see the molds have an oil to them and every time you make a hold that oil gets pulled out. also they lose there oil just sitting around. so get some clear machine oil and lubed up your rubber and store them in a dark place in a plastic bag. at least this is what i was told and it seems to be working. anyone want to fact check me?

Get a Grip (part 1)

here is where we left off last time when talking about making holds. you dont remember? well... maybe your a liar and you didnt read the last hold making Blog! maybe you should go back and read that one first? maybe you should read all the blogs in order like i suggested at the top of the main page? maybe you shouldnt let your ADD and need for instantaneous gratification rule your life so much? maybe i should get off my clydesdale and get on with this post on how to make your very own climbing holds? yup...


as i was saying this is where we left off. i needed to get more silicone rubber, HSII (high strength molding rubber) is what im using. you can get it online at different sites, just surf around a little. google "molding climbing holds" or similar things and you should fine what your looking for. there are even some suppliers that have little molding tutorials. some might say they are better than mine ...but those people are ungrateful asses! i dont see them putting you on the path! (i can see this post may be full of digression, and sarcasm... sorry?)

back to business. molding rubber comes in a tub, it's generally a white very viscus putty, then you also get a catalyst in a separate bottle. the catalyst will be a different color based on whatever rubber youve bought, sometimes clear, or blue. the one i bought is obviously pink. the good thing about the rubber is it will perfectly bond with a previously poured layer. that being said this is based on my experience. i have yet to have a problem, maybe one of you science types may know different. once you mix the two parts together, make sure theyre fully mixed, just pour it slowly and evenly over your original foam designs. i like to pour from a little distance above the mold box that way it helps to get air bubbles out of the rubber. you wont be able to completely eliminate them without a vacuum chamber but i havent felt it is necessary to get one. if you pour slow and even and dont stir a bunch of bubbles into the rubber when you mix it you shouldnt ever have a problem. once you mix the two parts you have about 30min to pours them. after that you have roughly 6 to 24 hours depending on what get. the stuff i use takes 18 hours so i generally pour in the evening and let is set up over night.


so the next morning this is what you get. all you have to do is break down the box. i generally try not to damage the pieces so i can reuse it all. the bottom section will be a little hard to pull off but dont worry if you waited the full curing time you cant damage anything, give it a tug! once you have the box off its time to clean the mold.


the foam will not ...ever.. come out in one piece. dont try to cut the foam out or you will wreck your mold. you want to peal back the rubber and break the foam. it is best to try and get the foam out in big pieces. if you can pull it out somewhat cleanly you can prevent leaving behind foam dust in the surface of your mold. as you can see in the next picture some foam gets left behind, this will happen no matter what. but you can go to some work to minimize it. oddly enough i found the perfect tool to clean the foam is one of the starbucks stirring stick/lid plugs.

if you look at the one end you can use the little end for cleaning foam out of fine detailed areas. the plastic is soft and doesnt destroy the rubber mold and more importantly that awesome texture! the other end you can take some fine sand paper to it... they have a sharp edge from when they are molded. once thats softened the big end can be used to work on bigger areas. when the dust inside the mold starts to drive you crazy go rinse it out in the sink. you will repeat this process a few times. next get that xacto knife you have been dying to wield, and GENTLY trim away the thin imperfections at the lip. the rubber will have crept in under the foam, so you will want to trim it back so it opens the mold a little. do it cleanly so the mold doesnt tear when your using it later. as you can see by the last pic you can ever fully remove the foam, but the first hold you pour will finish cleaning the mold. but dont worry youll still get a perfectly useful first hold, ill explain later.

Now gather up your supplies, you may need/will need to go to the craft store for some of these items, so make a shopping list and grab the keys!


what do we see in this picture, cause you need or will likely want all of it. first the no brainer... you need to get some hard casting resin, polyurethane or whatever you plan to use. again hit the internet, the stuff is out there. you can also get from the same places an assortment dyes, nobody wants all their holds to be a boring tan color or clear! if theres one thing the 1950's taught us is that america loves COLOR! that and McDonald's... uh,anyway, get some large popsicle sticks, paper towels for clean up and any device you can use as a timer... obviously a watch will do but a kitchen timer with that celebratory "ding" at the end is more fun! last of all go to the hardware store and get yourself some general purpose tubs. they should be in the painting section look at the picture. i suggest you get a couple of each size...

when you have everything together your ready to get started. oh one last set of suggestions, first set up somewhere with open air ventilation, next set up on a table you dont mind destroying (spills can be a B!), lastly take some painters drop plastic or cellophane and cover the work surface. that way if you do spill it will be easier to clean up. that said, spill enough and the exothermic reaction of the resin curing will burn through the plastic.

on with the hold making... first measure out equal parts of resin (or follow the directions that came with your stuff). in this case, all the directions will be specific to the stuff im using but general in process for just about everything else. so you now have to equal parts, one clear and one not, measured out in your two smaller tubs. (clear = part A, not clear =part B) if you want to color the holds your gonna pour now is the time. i suggests that you color your first hold gray/black, or the same color as the foam you carved your design out of. because when you pour the resin it will grab and pull out those last bits of foam you werent able to get. when this happens the hold will retain the foam....probably forever? and if they are the same color you wont notice or care. so i dip the end of my stick into the dye and and get just a little. keep in mind a little can go a long way with this stuff!

so pour part A into a larger tub (make sure this one is big enough to hold the totals volumes of part A&B), and stir the dye into part A. keep stirring until it is completely mixed throughout! if you dont will make seams in your hold and it will break! also if you use to much dye it will make the hold weak and it will break ...broken holds equals wasted money, do what ya want.


Alright your ready to go for it. heres the deal, once you pour part B into part A you have about 30 seconds of working time. after that the reaction cascades to a point where the resin hardens, and then your screwed. so you have to be ready to work quick. have your molds out and ready to pour. have an extra stand-by mold to pour any extra left-over resin into. i get my footholds this way.

** side bar: if you dont want to risk waste you can pre-measure the volume of your molds using water. just measure out how much water you use as you fill your molds. once you know this, divide the total volume by two. this is the volume you will need to measure out of part A & part B.

okay you have your molds out and ready, you have the dye well mixed in part A waiting in the BIG tub, you have part B measure out, you have a timer close by, and your itching to make your first hold! well, pour part B in and start stirring go quick but try not to slosh it on yourself. count to 15 in your head, run the stirring stick against the sides of the container, get this as evenly mixed as you possibly can!! if you dont, it wont set up right! after you think you got it carefully pour your mix into the molds. try to pour quick but cleanly into one spot so it doesnt make bubbles. once you have poured it all out start your count down. the demold time is usually about 5 min. this can be affected by several things, such as ambient temperature or the specific product you use. but you can also tell by looking at it. check these out ...liquid to SOLID!


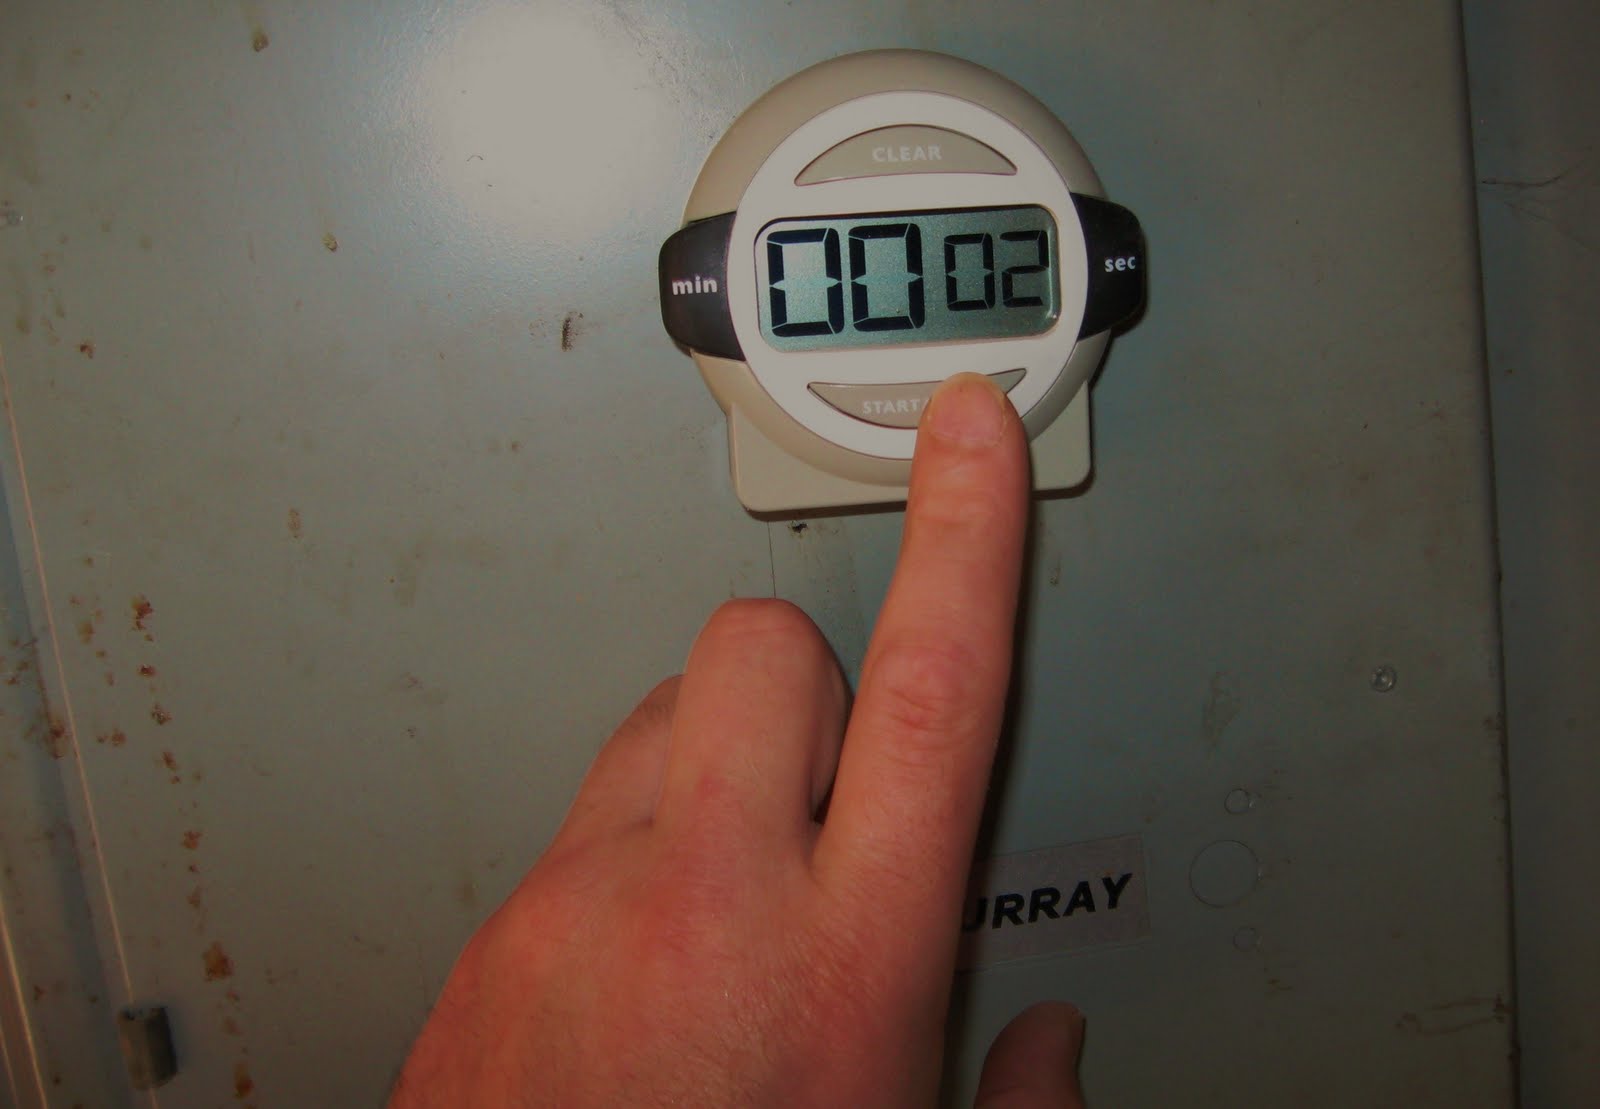
(where is it? check out: Get a Grip, part 2)