
i like giving you images first and letting you thinking about where this is all going! any ideas?
(treadwall) - (assembly) + (colorful yet cryptic drawing) = ....blog post!
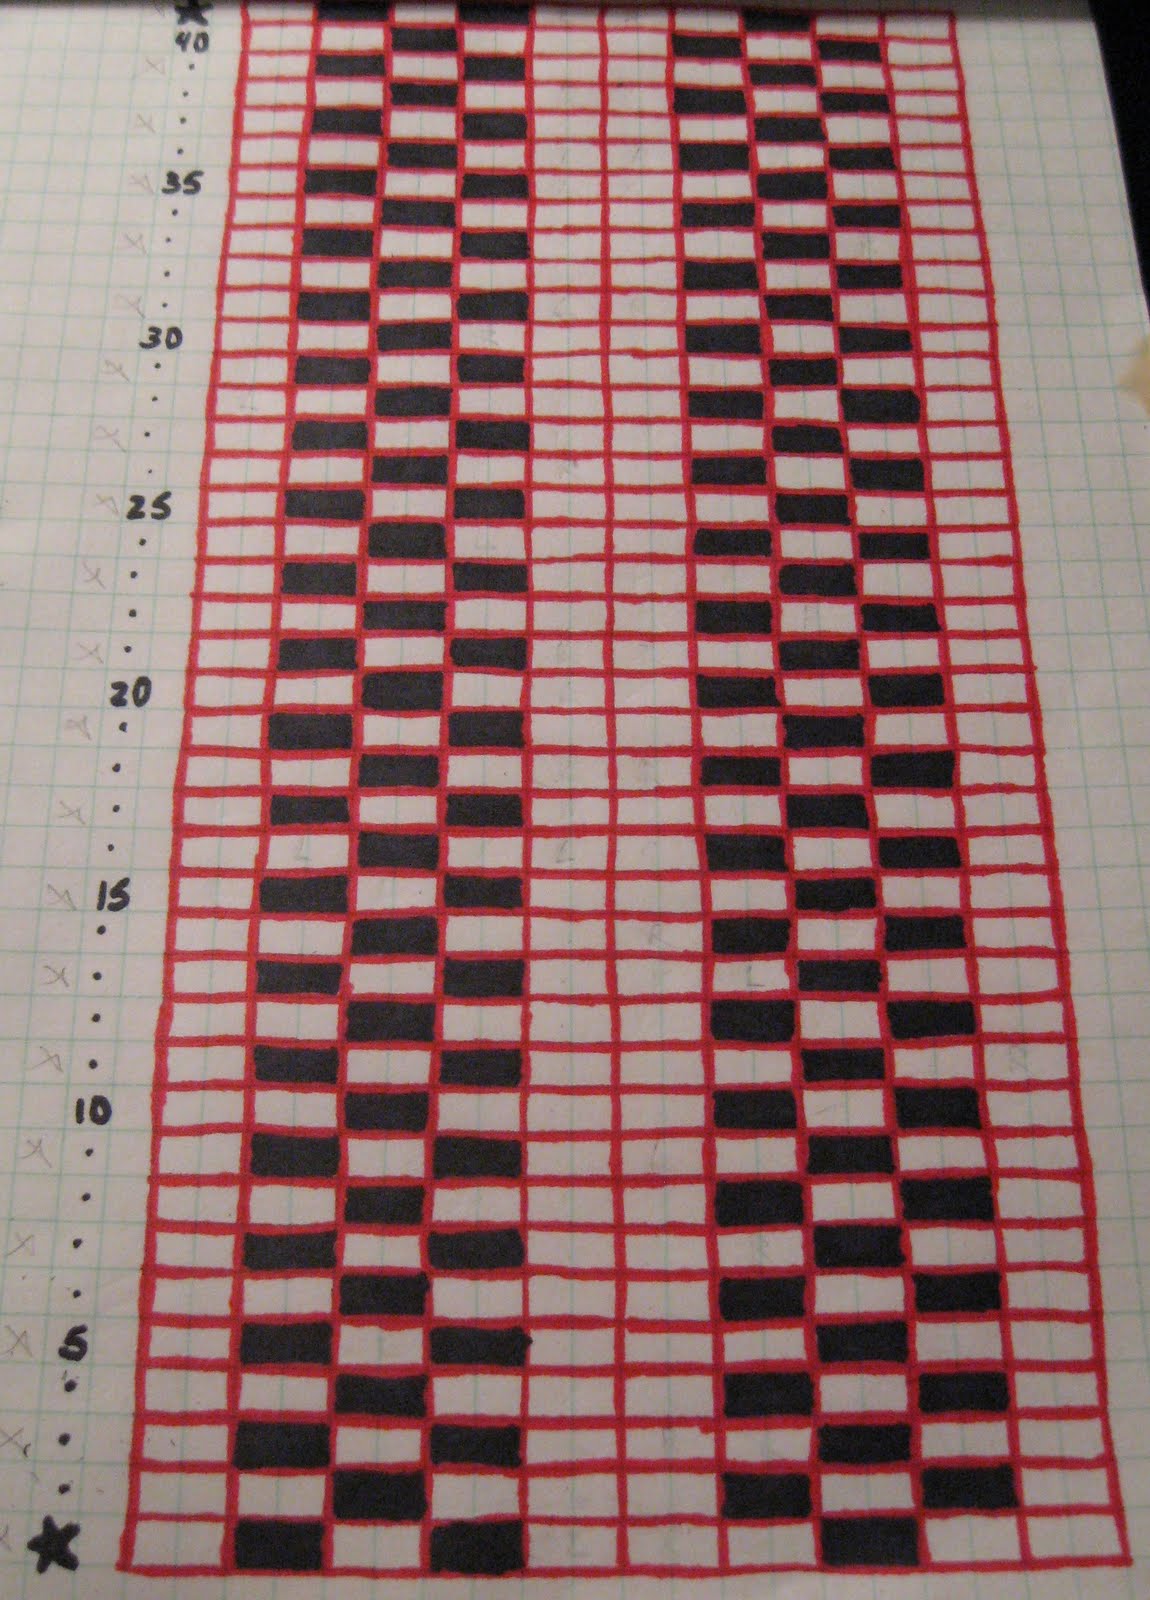
alright for awhile now i have been trying to make the perfect route for warming up and doing never ending mileage on the treadwall. i had some criteria for the route. i wont bore you with all those details so we can skip to the point. i wanted the route to have equal movement bilaterally for the body. often routesetters will unconsciously set routes to favor their strong side, be it left or right. the treadwall is a perfect medium for avoiding this failure.... or so i thought. that drawing above was the first map i made for the treadwall. it's crude, but it shows all the possible bolt positions in one rotation of the wall. i made it so i could plan out my perfect route as opposed to trying to due it freely on the route as i have done when i first got my treadwall set up.

here comes the bad part... im sorry brewer's ledge, but your wall has a flaw. it is impossible to set a route to have exactly mirrored movement for the hands and feet. not in their method of assembly anyway. after spending WAY TOO MUCH time on this problem i finally came up with one solution. i would take off half of the panels and reorder them so that the first 10ft of climbing was set opposite to second 10ft.
on the right here you see my second map.... i made this one on the computer... got tired of drawing, and now i can print out a new one if i need it. but by comparing the two maps you can see where i change the bolt pattern to allow for the setting of a perfect route. focus on panel lines 1&40 as well as 20&21. by making this adjustment i was able to set a route that recycles and is perfect to the micron... okay not that perfect but its as perfect as 1+1=2.
oh, little caveat i dont belief all treadwalls have this problem... i looked back through some of my archive photos and i think this bolt pattern is specific to the newer treadwalls. im not positive but i believe some older walls had a more standard grid bolt pattern (as opposed to the offset pattern found on my wall). if im wrong oh well...fixed my issues anyway. GARNET!? i know you read this bad boy... throw in a comment what do you think?! dont be shy... unless you might get fired? in which case, dude take care of your fam-damly!
these last two shots i put in a bunch of my own foot chips (yup! designed, molded, and poured in my house) on the re-ordered panels to help emphasize how the bolt placements are offset. the blue tape line show the gap between panels 1&40 by the way. lastly ill say, i like the offset pattern, it helps with being able to see where to put your feet. it doesnt stack the holds on top of each other too much. but the standard factory assembly instruction tweaked a bit works better for me. i said my piece, check out the last pics, comment if you have a pair!


No comments:
Post a Comment