so, Ive decided to take at a stab at the "frequently asked questions" posted on the Brewer's Ledge website. In general I agree with all of their answers and found them to be both accurate and fair. In that same breath I also believe their answer to be generic. Mine on the other hand are more for the private purchaser and have the benefit of not being official and thereby more "colorful". again these are my opinions and only mine.
HOW HARD IS CLIMBING ON THE TREADWALL?
The obvious answer is your path is as hard as the one you choose. Need it easier or harder, then set the route differently. It should be noted that should you choose the Treadwall KORE model then at least the wall is never easy. I have heard plenty of chatting about how easy the wall is. Not so when you can never put it to a slab setting! At the same time I have set 5.8/5.9 warm up routes with jugs which are considerably harder when placed to 35 degrees overhanging.
HOW FAST CAN I CLIMB ON THE TREADWALL?
This is well answered by Brewer’s ledge, but I will add my opinion. You can climb as fast as you want, but changing your tempo is hard mid workout. Sometimes, when you are climbing harder routes you wish you could dead point longer moves. Unfortunately the set rate of the wall forces you at times to do a lock-off until the wall rotates and reveals the next hold. Arguably this could be considered a good thing as it forces you to train lock-offs…albeit unintentionally. You can avoid this issue through route setting. But generally the walls tempo/speed, is set to you and the function of the auto-stop makes the wall better than powered models which would spit you off just as a traditional treadmill. The adjustment of the speed is in a fine range, you will kinda tweak it in at the beginning of each work out. But I tend to make minor adjustments depending on the climb I’m working at that moment….moving on.
HOW DOES THE TREADWALL KEEP PACE WITH THE CLIMBER?
As Brewer’s ledge mentions the auto-stop is great. It is helpful to take a couple seconds to shake out and chalk up. If you are climbing at a faster rate (i.e. speed climbing) the auto-stop can be kinda jerky especially is you don’t keep a good pace in the middle of the climbing height. You may consider turn off the auto-stop in these circumstances. But at a more reasonable pace it’s neither jerky nor distracting. It does take a little getting used to though; if you shift your weight off the stop trigger (the last panel) you can get a surprise exit from the wall. It took my about a week to build a habit that avoids this. Another funny surprise I found to be when falling and jumping off. I generally have an unconscious sense of how high I am by how far I’ve climbed. Makes sense right? But when you blow a move or find your endurance lacking the ground is surprisingly close. The first time I hit the ground much sooner than I expected it I laugh loudly for my instinct had made me believe I had been far further from the pads.
HOW DOES THE TREADWALL WORK?
Sooo…gravity! I don’t think I can add much to the Brewer’s ledge answer. To go beyond would just be helping the Chinese to set-up a factory and put our boys out of business.
CAN TWO PEOPLE CLIMB AT ONCE?
I agree with the Brewer’s ledge answer… but, not really. I think this “question” is only here for the fitness gyms. I doubt the average private purchase climber would ever try to have two climbers use the wall at once. It would be a crowding issue. It would make it harder to actually train. But I have trained with a partner in a session. Taking turns as you might in a gym and this works well.
HOW LONG SHOULD I CLIMB FOR?
This is as they have said all dependent upon your training goals. I am still in the process of developing my own. I hope in the future to publish what has worked for me…stay tuned? I guess…
WILL THE HOLD PATTERN GET REPETITIOUS?
Again I agree with the published answer. I wish, in addition, to address a similar issue. I have found that one of the few true difficulties of using the treadwall is sequencing and onsighting. This is because unlike with conventional climbing you can look up at the sequence and plan accordingly. Therefore a more technical sequence is easy to blow. Keep in mind you’re the one setting the route so… how much can you really complain? In this vein the repetition of doing the route will help you to focus more on what I call programming a difficult sequence. See, in red pointing a route at your peak level what often makes the difference in failure or sending is truly knowing the route. The treadwall will unintentionally force you to develop this skill. Bear in mind all training programs are inherent with pros and cons!
DO I NEED SPECIAL SHOES TO CLIMB THE TREADWALL?
Yes! If youre gonna train, then train by recreating the conditions as close to normal as possible. At the same time, the treadwall itself does not care which type of shoes, if even at all, you choose to wear.
CAN ANYBODY USE THE TREADWALL?
Nope… there are many who cannot or might find it very difficult to use the treadwall include; individuals with IQ less than 35, Quadriplegics, multiple amputees, and the poor. I know, “the poor?” you ask. Lets be honest kids it aint cheap and there are very few gyms with a treadwall which have a membership program for those of lower socio-economic status. Apply that to the Olympics, are we really seeing the best in every sport, or just the best of the ones who are rich enough to train all their lives and compete. (soap box alert!)
CAN YOU BE TOO OLD TO CLIMB?
Yes! Dumb question… obvious answer…
DOES EVERYONE LIKE IT?
NO! again… dumb question … with an obvious answer. But I have to point out that most of the people I have run into who nay say the treadwall fall into one of three categories: 1) not a serious climber/has no training regime. 2) never actually been in the same room with the treadwall. 3) serious climber & used treadwall.. but their use is limited to the M6 fitness gym model with routes either set by an amateur or no actual routes at all. Given this their opinion has little weight in my book!
I HAVE NEVER DONE THAT. WILL IT TAKE ME LONG TO LEARN?
Really?... my initial response is… boo hoo, if youre asking if climbing is too much for you to learn, then; YES! It is too hard for you, go play Badminton little Maid Marian. …I guess this could be a legitimate question. No its pretty user friendly and intuitive. The boys did a good job designing and refining the treadwall over the years.
WHAT KIND OF BODIES DOES FITNESS CLIMBING BUILD?
I think this too is a fitness gym question. The archetypal climber physique is the V-shape torso with thin legs. That said who hasn’t seen climbers come in all shapes and sizes?
WHO USES TRADWALLS?
Um.. I do
DO SERIOUS CLIMBERS LIKE THE TREADWALL?
Umm…. I do. Oh, im not good enough for you?! Well my main climbing partner is sponsored and on the US climbing team (she gets embarrassed when I point that out…its funny). But, she uses the treadwall with me and likes it… also, there is a whole group of climber in the Red River Gorge area who swear by it... Crediting the treadwall with giving them the endurance and strength to do their harder tics.
Showing posts with label Treadwall Kore. Show all posts
Showing posts with label Treadwall Kore. Show all posts
Wednesday, September 22, 2010

Thursday, September 9, 2010
fully retractable
yeah i just like to have ideas...then try them out... then ramble online about them weather is all crappy. enjoy it, now that my wall is set up and i get back into rock climbing... as opposed to blogging about it, youre probably not gonna get thirty post a month. (blogging is kinda of a sad made up word that i am unfortunate to have in my vocabulary... just to be honest with myself)
getting to the point. so you all know im a fan of the adjustable leg stands for the treadwall KORE. but i found i need a little something more. the legs dont have graduation marks on them. so... what to do?... what to do?... i know... engrave it! crap i dont have an engraver, in fact i dont know how to engrave something... no experience with even watch a youtube video of engraving. but if you can ...by all means, go for it. instead you can use my sharpie method!
all you need is a sharpie, preferably one with the wide tip end and a T-square.


extend the leg to their tallest setting, then place the square as shown in the picture. from here make some marks as you see fit. i went with one inch spaces...seemed like a good idea at the time.
next take the wide tip and make a thick line using the larger jacket (dark gray) to trace your line. you can slowly drop the crank to make each lower line.


it will look something like this when your done. oh... and when you done you can also mark it with some refrence numbers. might help a bit. in the end, you are all set to advance your angle of difficulty as you get stronger, all the while being relatively certain that youve kept the wall level.
getting to the point. so you all know im a fan of the adjustable leg stands for the treadwall KORE. but i found i need a little something more. the legs dont have graduation marks on them. so... what to do?... what to do?... i know... engrave it! crap i dont have an engraver, in fact i dont know how to engrave something... no experience with even watch a youtube video of engraving. but if you can ...by all means, go for it. instead you can use my sharpie method!
all you need is a sharpie, preferably one with the wide tip end and a T-square.


extend the leg to their tallest setting, then place the square as shown in the picture. from here make some marks as you see fit. i went with one inch spaces...seemed like a good idea at the time.
next take the wide tip and make a thick line using the larger jacket (dark gray) to trace your line. you can slowly drop the crank to make each lower line.


it will look something like this when your done. oh... and when you done you can also mark it with some refrence numbers. might help a bit. in the end, you are all set to advance your angle of difficulty as you get stronger, all the while being relatively certain that youve kept the wall level.
Thursday, September 2, 2010
on display
so i have mentioned that i think the distance counter is worth while to get. and i ordered one with my wall. unfortunately they guys forgot to include some of the wiring for it. see an extra power line needs to split off from the auto-stop to light the display and i thought for a while that i was missing something. but i eventually call Conant. we rapped for a bit and in the end he told me he would throw the wire in the mail. i only mention this because it illustrates these guys and how they treat their customers. several times i have gotten calls and emails just to check and make sure things were up and running as it should. they have the "small company that cares" thing working for them...


almost forgot ... because its not included in the standard assembly the directions dont mention that the display bolts on with the spacer bar. this non-standard is the reason that they forgot my power wire by the way. also, wrap the wire around the spacer and i suggest taping it with route/duct tap just to keep it from getting snagged to caught in the chains. it's all kinda a no brainer but i would also hold off putting it on until after youve raised the unit. or maybe brewer's ledge has a better way? comment?
anywho... i got the wire. in plenty of time as we all know i took my time assembling the treadwall. did a little bit of testing with and electrical meter to make sure i got it right, plugged it in and the first thing i saw.... HI. ha ha haa ah ha! my treadwall just said HI! worked no sweat. and its nice cause it can also count down. so you can preset it with your target. which is a mind game but it helps motivate me that much more. picture?


almost forgot ... because its not included in the standard assembly the directions dont mention that the display bolts on with the spacer bar. this non-standard is the reason that they forgot my power wire by the way. also, wrap the wire around the spacer and i suggest taping it with route/duct tap just to keep it from getting snagged to caught in the chains. it's all kinda a no brainer but i would also hold off putting it on until after youve raised the unit. or maybe brewer's ledge has a better way? comment?
Wednesday, September 1, 2010
first flight
oh here are a couple pics from my first session. im sorry theyre not very good. basically the shed is too small to get really good angles. ill see what i can do to improve that!


after that i broke out all those holds ive been making! and did something i havent done for a year!

oh and check out my newest mega pinches!


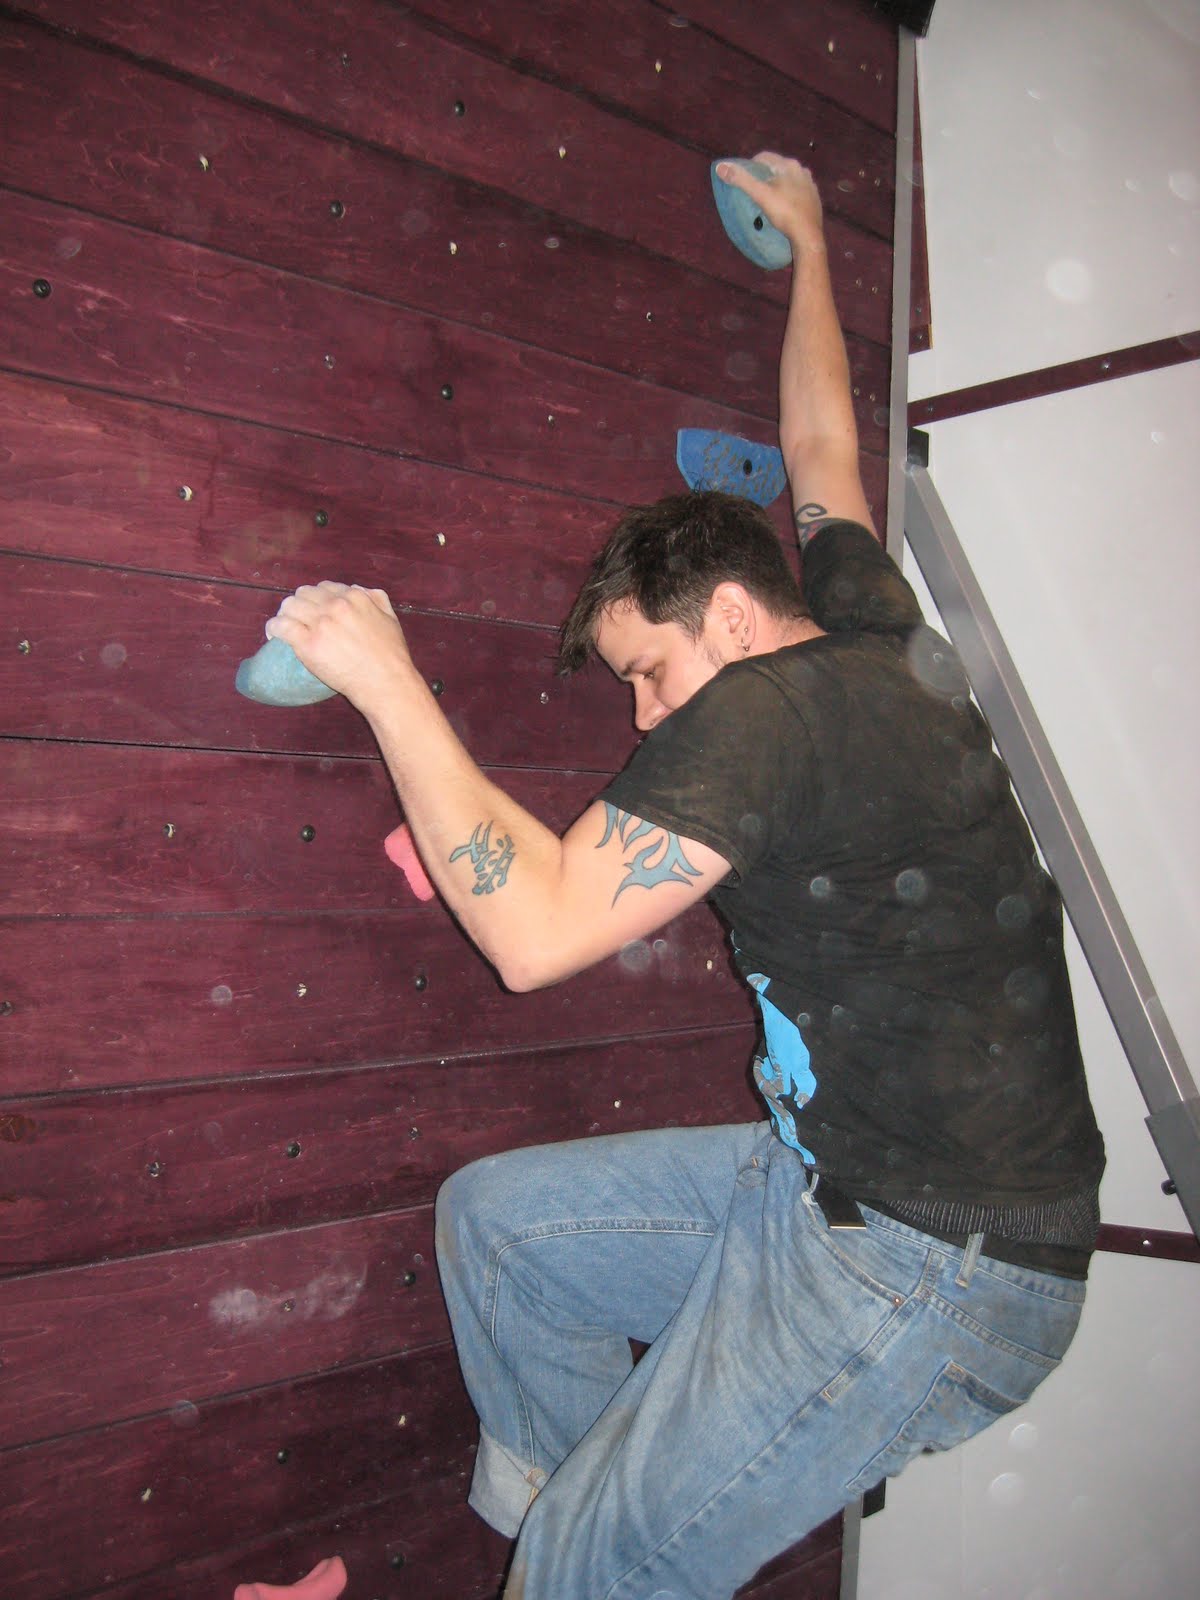
after that i broke out all those holds ive been making! and did something i havent done for a year!

oh and check out my newest mega pinches!


back on track.
so once i had all the frame, channels, covers and shafts on, it was time for the chains. they were officially the messiest part of the job. they come WELL greased from the factory... i suggest some rubber gloves be on hand. they go on easy and adjusting them so theyre in sink with each other is easier than i would have thought. i had a little hiccup that ill talk about in a different post, but that shouldnt be a problem with anyone else.


my panels came unfinished like i wanted... i did them up with a "royal mahogany" stain. the panels need to be pre-assembled with some additional components prior to mounting on the treadwall. then there is this whole left/right orientation thing... none of it is that big of a deal. a little time consuming, but they make it easy not to mess it up. below you see blair checking the orientation of the next panel. later i started assembling the panels in bulk. note: the white and black taps do help keep them straight.


and then, put on more panels....


eventually i got to a place where there were so many panels on the treadwall that it makes it hard to work, so then you use a stick to lock the wall and keeping it from rotating. see, the panels want to rotated so theyre at an even level... but this isnt help to put on the next board.


the last panel was kinda fun...you have to insert it at the bottom of the wall and reach through this access hole. not bad, but a little blind.... i guess that isnt super important info.

now thats it for the basic assembly. i have a couple of add-ons that ill put in my next post but in general between myself and the others who have been posting you get the picture.


my panels came unfinished like i wanted... i did them up with a "royal mahogany" stain. the panels need to be pre-assembled with some additional components prior to mounting on the treadwall. then there is this whole left/right orientation thing... none of it is that big of a deal. a little time consuming, but they make it easy not to mess it up. below you see blair checking the orientation of the next panel. later i started assembling the panels in bulk. note: the white and black taps do help keep them straight.


so each panel gets two screws and two lock nuts per side... 4 per panel x 20 panels = 80 bolts. given that, i really suggest you get a drill gun and a socket wrench! otherwise your gonna be there a little while... i know because i did the first twelve with blair, each of us using a screw driver and a wrench. boy that was dumb!

needless to say, we spent a lot of time putting on panels....

needless to say, we spent a lot of time putting on panels....


and then, put on more panels....


eventually i got to a place where there were so many panels on the treadwall that it makes it hard to work, so then you use a stick to lock the wall and keeping it from rotating. see, the panels want to rotated so theyre at an even level... but this isnt help to put on the next board.


the last panel was kinda fun...you have to insert it at the bottom of the wall and reach through this access hole. not bad, but a little blind.... i guess that isnt super important info.

now thats it for the basic assembly. i have a couple of add-ons that ill put in my next post but in general between myself and the others who have been posting you get the picture.
real men dont need maps
...sorry for taking so long to write these. things were just against me getting to this sooner. but then again, i dont really owe you anything anyway.... so tough?
alright here we go.. recap: i research the wall. i looked online at the brewers ledge site and it told me the treadwall "lives" in a box 7x9x12ft. well, sorta... in fact the treadwall with the hand cranks is actually more like 8ft wide. 12ft tall works but if you want the full height range i would go for 13ft-ish. so while they are correct 9ft is deep enough for the wall i would suggest you go for 12ft deep so you have room to assemble your wall per instructions. my shed i built has outer dimensions of 8x10x14ft. so the indoor height works great. the width came up about 3inches too short... crap! and the depth was such that i could in no way assemble as brewer's ledge intended.
well, gotta make lemonade. i really didnt want to tear down the shed and start over. so, after hatch several plans i start to build it in standing up. i already gave some info on that so go check out that past post. needless to say it went well, heres a couple pictures.


the significant thing i found is that one guy can do this alone. where as the other way you cant...or so i have been told. the hardest parts are putting on the right channel (it's the heaviest piece). so if you have a second guy great. if not put a bolt in the upper frame where it bolts to the spine and duct tape it to keep it from moving. next lift the right channel into position and and hang it on that bolt. get the left channel on the same way. then add the center spacer bar and the lower shaft. the lower shaft takes some fiddling to get thing done. there is nothing in the directions from BL about moving the collars on the shaft to install it but i found no other way in the upright assembly.


next put up the upper shaft, and the shroud. this pretty much goes the same as in the BL instructions. it will be a little heavy and awkward but doable for one person. all the same, Blair was there to help me out. thanks big guy!

alright here we go.. recap: i research the wall. i looked online at the brewers ledge site and it told me the treadwall "lives" in a box 7x9x12ft. well, sorta... in fact the treadwall with the hand cranks is actually more like 8ft wide. 12ft tall works but if you want the full height range i would go for 13ft-ish. so while they are correct 9ft is deep enough for the wall i would suggest you go for 12ft deep so you have room to assemble your wall per instructions. my shed i built has outer dimensions of 8x10x14ft. so the indoor height works great. the width came up about 3inches too short... crap! and the depth was such that i could in no way assemble as brewer's ledge intended.
well, gotta make lemonade. i really didnt want to tear down the shed and start over. so, after hatch several plans i start to build it in standing up. i already gave some info on that so go check out that past post. needless to say it went well, heres a couple pictures.


the significant thing i found is that one guy can do this alone. where as the other way you cant...or so i have been told. the hardest parts are putting on the right channel (it's the heaviest piece). so if you have a second guy great. if not put a bolt in the upper frame where it bolts to the spine and duct tape it to keep it from moving. next lift the right channel into position and and hang it on that bolt. get the left channel on the same way. then add the center spacer bar and the lower shaft. the lower shaft takes some fiddling to get thing done. there is nothing in the directions from BL about moving the collars on the shaft to install it but i found no other way in the upright assembly.


next put up the upper shaft, and the shroud. this pretty much goes the same as in the BL instructions. it will be a little heavy and awkward but doable for one person. all the same, Blair was there to help me out. thanks big guy!

Sunday, August 15, 2010
giving birth standing up
well, i gotta say my shed hasnt worked out as well as i have wanted. there are several things i woulda/coulda done better! i could have put a couple of double doors on the end. or i coulda just made the shed 12x10ft instead of 10x8ft.... and i would have if i knew then what i know now. i dont really blame Brewer's ledge, but when i next talk to the guys i think ill mention they make some changes to there space requirements. basically you want more space then they say.
...arg wish i had made a bigger boat! ill add a photo demonstrating how youre supposed to assemble it lying down a little later. for now...im back to building a treadwall!
UPDATE!
so the answer is YES the treadwall can be assembled in a standing position! but heres how i screwed up. i had no idea about how the wall is actually assembled when i built my shed. but i should have been able to figure this one out...me dumb. so we all know the climbing surface is around 10ft. and ive seen pictures of the wall so i should have know that the two side panels are about that same height. next...i knew from talking to others that you assembled the wall and then raised it up with the help of a friend or two. so why i didnt figure out that i needed more depth 9ft 5in inside is kinda comical.
...arg wish i had made a bigger boat! ill add a photo demonstrating how youre supposed to assemble it lying down a little later. for now...im back to building a treadwall!
UPDATE!
so the answer is YES the treadwall can be assembled in a standing position! but heres how i screwed up. i had no idea about how the wall is actually assembled when i built my shed. but i should have been able to figure this one out...me dumb. so we all know the climbing surface is around 10ft. and ive seen pictures of the wall so i should have know that the two side panels are about that same height. next...i knew from talking to others that you assembled the wall and then raised it up with the help of a friend or two. so why i didnt figure out that i needed more depth 9ft 5in inside is kinda comical.
 it was a close one getting this machine built. as you can see by the pictures above you essentially assemble the entire structure of the wall then raise it up and put in the bolts on the lift legs. couldnt do it. for a while it thought i might put together a lot of the wall then walk it in. but this thing weighs a lot!.... a hell of a lot. in fact if anyone tells you it doesnt....tell them it weighs between 800 and 1000lbs fully assembled....so carrying any portion of it partly assembled is a recipe for back injuries. thats not worth it when all im trying to do is get this thing built so i can train
so two plans later and much head scratching... (i know i could've call brewer's ledge, but im a figure it out myself kinda guy) ...plan three! assemble mt treadwall completely out of order. i decided to build the 2x2 steel frame and then put all channels and cover on after. look at the pictures below and youll see the yellow highlighted frame is what went up first, the red stuff got added once i had a free-standing frame. turns out my plan worked...also i think a guy could almost build a treadwall alone by this method, although help is nice. after that its pretty cruiser... the lower shaft had some issues going in and the upper shaft and shroud are heavy on a ladder, but it was the only way.
 **Brewers Ledge, kindly asked me to change the images...happy to do so. i guess theres no need to help the copyright theives... given that i figure these new images still make the point and dont tell you anything thats not in any other photos on the net.
more details and pictures to come...soon? oh!.. thanks to my pops, victoria, and especially "blake stipple" for helping me today. the wall currently is partially assembled with 12 slats... ill be staining boards the next couple days and trying to be ready to finish it up on my next weekend off!
also i noticed the ready traffic was up the last few days... if you guys have questions or just want to yack i do encourage comments!
Friday, August 6, 2010
one big ass truck later

so again...R&L sucks! they were late again, but at least i got my treadwall. check out the big ass truck! my neighbors didnt know what to think. it was kinda funny.

also, the guy had it loaded behind a bunch of other
shit and he couldnt get it off the truck on the pallet. so, i actually backed my truck up to the carrier and load it piece by piece... fun. but i got it!

after that, i drove it down and stacked it into my driveway to kinda see what i had... its a little daunting at first. there are a lot of pieces, but the instruction look user friendly. everything seems heavy duty and well built.

then i noticed one of the bearings was crooked. actually kelly saw it, he dropped by for a sec. so, Conant had given me his number to check in, i called him to get his thought before i start whacking on it with a rubber mallet. sure enough Conant says that it isnt uncommon for that to happen in transit. he said it should self realign when i start putting it together...or tap it with the mallet and call him back if i have any trouble...thanks boss.
so i read my instruction and got all excited to put things together walked it around the shed...laid things out...tried to lay thing out...Crap! watch the video...
Wednesday, July 14, 2010
ITS DONE!

Conant emailed me today to let me know my treadwall KORE is finally done..... unfortunately i work nights and didnt get the email until they had already closed back east. so, tomorrow i will give them a call and make my last payment and i'll let you know when it arrives!

Oh and Josh from Organic sent me a paypal request for my crash pads....arg and the treadwall shed isnt done....guess, i wont be going to squamish this weekend. alejandro's gots chores!
Saturday, June 26, 2010
the Treadwall Community
we all know i spend way too much time prowling the world wide intra`neb for pictures and info on treadwalls. i especially track down pictures of peoples home setups! recently i found that a guy on the http://www.redriverclimbing.com/ forum posted some pics of his home training setup. so, public domain become filler on the Treadwall Project. here are the pics from BCombs!


this is one of the older models that has been ....from what i can tell stripped from it original frame/stand. not the first custom set up treadwalls i have seen. so if you get a chance to save some money buying a used treadwall you could always go this route so you dont have to be limited to only twelve degrees overhanging. plus if you dont have a super tall ceiling going this way will work, unless youd rather cut out a hole.... um, blah blah blah, lost my train of thought ...enjoy the pics

OH!!! i remember what i wanted to say! so if you have a treadwall or you train on one at a gym, send me a pic. share your set up and any training ideas you have for the rest of us! um, if you dont well then you are a sucky individual that is lazy and that makes baby jesus cry! and i dont know about you but i think crying baby jesus is on par with hunger striking buhda! and he might do that. not too mention allah will put a jihad on you... vishnu, no lotus... zues, no lightning... gaia, no ground!!! ...yhwh, will undo all creation! ....thanks
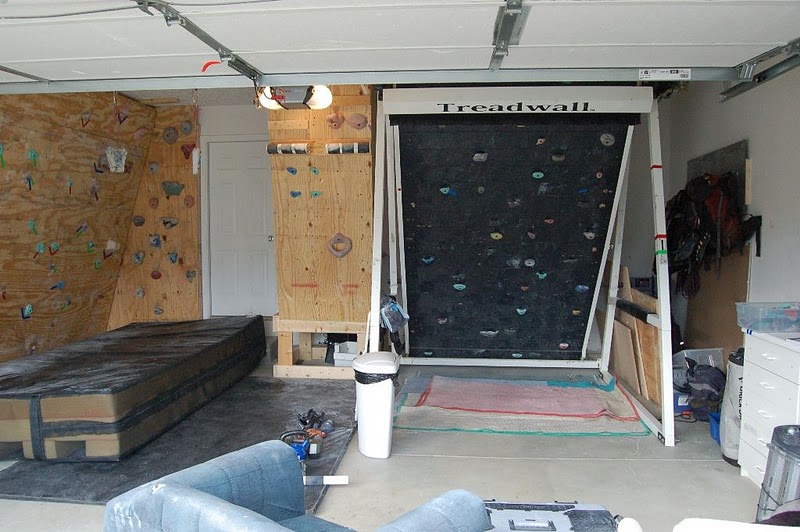

this is one of the older models that has been ....from what i can tell stripped from it original frame/stand. not the first custom set up treadwalls i have seen. so if you get a chance to save some money buying a used treadwall you could always go this route so you dont have to be limited to only twelve degrees overhanging. plus if you dont have a super tall ceiling going this way will work, unless youd rather cut out a hole.... um, blah blah blah, lost my train of thought ...enjoy the pics

OH!!! i remember what i wanted to say! so if you have a treadwall or you train on one at a gym, send me a pic. share your set up and any training ideas you have for the rest of us! um, if you dont well then you are a sucky individual that is lazy and that makes baby jesus cry! and i dont know about you but i think crying baby jesus is on par with hunger striking buhda! and he might do that. not too mention allah will put a jihad on you... vishnu, no lotus... zues, no lightning... gaia, no ground!!! ...yhwh, will undo all creation! ....thanks
Monday, June 21, 2010
Treadwall, Improving the patent?
ive been holding onto this for a little while now and i figure its time.... especially with all those boring shed posts. anyway ive shown you pieces of this photo before but check out the whole thing.... see if you can steal my thunder.

....i like this photo it would be a lot cooler if it wasnt indoor climbing. but when youre looking to show off the Treadwall KORE there really isnt a better picture. so did you spot the best part?
no, ....its not the ORGANIC crash pads, although i agree those are some of the best pads ever. especially bang for buck. just in case you havent been inundated with them at the boulders yet check out the web site: http://www.organicclimbing.com/
nope, its not the safety pads this guy wrapped around the legs....we already talked about that in case you missed it: http://treadwallproject.blogspot.com/2010/06/potential-problem.html
maybe you noticed the fact that this guy has some of the coolest holds ever made .....Pusher! but although that is awesome, its not the big point im getting at.... oh, by the way if you hadnt heard yet. PUSHER IS BACK! : http://www.pushergear.com/

okay kids, no more games here it is, ....see they changed the Logo! it has a black border with red text! cool right!

yeah, that was dumb i admit it. no no, this guy has beef up his treadwall mounting an old school Metolius Simulator hang board to the shroud. which if you ask me was the one to get because unfortunately they redesigned the simulator and made it lameski! see: http://www.metoliusclimbing.com/simulator.html
but before i point out how this was done and all the cool things blah blah blah, i did want to mention another hangboard that is AWESOME! (you see the "kids" tell me that when youre writing or "texting" that capitals mean youre really excited .....is that true?)
 this is the "Head Board" by Etch, its one of the best hang boards ever. it got good jugs, no ridiculous amounts of pockets, a nice sloping rail, and the edges are great. i want to point out that i rarely agree with jason kehl but he made the point "if you want to train to fingers on a hang board? just take the other off" (maybe that isnt an exact quote). anyway, the best part of this hold is the amazing pinches on the bottom of either side. most hangboards dont have this feature..... they should. now normally i would tell people to check out the site but.... Etch on their site sells the board for $69.95, while our boy at Brewer's Ledge carry the board in their online store for $49.95. now i want you all to know that i am not sucking at the Treadwall teet. i really do love this board and i find it the oddest coincidence that it just happens to be the board they chose to carry. but, if they guys want to send me a free one when they ship my treadwall just cause i do pimp their shit, i wont complain. (**hint,hint** well see if they have been snooping on my blog)
Hangboard customizing~ so backing up to the whole... inspiration? ....point? ...purpose, yeah thats it. it was suggested to me by someone at Brewer's ledge the idea of adding a hangboard. to do this is easy. first, remove the shroud from the top of your wall. next, get a piece thin plywood and mark out where the screw holes line up. then drill out the holes and do the same to the middle panel on the shroud. youre gonna need a set of nuts and bolts so head the local hardware store. oh be sure theyre only as long as absolutely necessary! if you wanna do it right, you could use t-nuts, then pre-check the length of your bolts and cut them off so they dont stick out. this will insure that the holds dont scrape. so if you havent figured it out yet, put the plywood inside the shroud while mounting your hangboard on the outside. and Voila!
Friday, June 11, 2010
Potential Problem?
 HEY!!!! something just hit me as i was reviewing and editing my posts.... as scrutinizing as i have already been with this photo i am gonna take it one step further
how many of you alreay noticed the piece of foam hugging the leg of the Treadwall? this picture is from a private owners collection, so i can assume this is not a company suggestion from treadwall. but does this guy know something we dont. has he repeatedly kicked or hit the leg while climbing? maybe fallen into leg while climbing or popped of the wall and cracked himself? enough so that he has now attempted to protect himself from injury? OR is he simply paranoid?
well from only a photo an argument could be made for both. i guess this is another question i will try to answer in my final review!
(...honestly, do you love how observant and obsessive i am? it may be an illness... not sure.)
Treadwall Kore: check out the legs!
i have wanted to delve into this area for a while, and i have touch on it previously.... but were gonna pretty much talk it to death this time around. what truly makes the difference between the Treadwall M6 and the KORE. we all know... at least you should by now, the "M6" is the flagship fitness gym model, the big, the bold, the beautiful. but.... its lame! my apologies to the boys at Brewers Ledge. but sticking to my poor tact approach, you knew that there was a population of climbers out there just like me that loved the idea but werent fully impressed. therefore you cant be to surprised to hear it said aloud....i mean in print. as i was saying, it only goes from +12 degrees slab to -12degrees overhanging. fun for some yes...but we say boo, you can do better. so we were given the Kore. its lighter, trim, less frilly, thinner legs and she goes down. sounds like the kinda girl you sneak into the house when dad aint lookin? kidding...
i have an opinion that when training anything less than vertical is rarely helpful (aside from focusing on smearing technique). for someone who climbs regularly, a slab wall doesnt provide enough of a workout to promote gains. also, near vertical climbing technique and overhanging technique are very different. There is that fine line dividing when your pulling your hips in to keep as much weight as you can onto your feet and when your ass drops out below you, hanging most of the weight on your hands and all the feet are doing now is pushing you to the next hold while your core is trying desperately not to let you cut!

 so lets talk about those legs. the kore comes standard with only three height positions. the fixed positions are -25, -30, & -35 degrees overhanging. while, these angles are remarkably more effect for a true climber and their training needs when compared to the M6 option, i am glad theres more, the angle changing frame up grade! ...yes up grade means more money. $460 will be worth it, because when you buy this you get -5 to -35degrees of climbing. which to me sounds awesome!


Wow! looking at these two scale drawings ive done just sold me on the fact that i made the right decision! you can really see the difference between the three settings of the static adjustment frame, and the extremes of the variable angle changing frame. plus, you know your body would really know the difference. im also sure youll agree the ability to vary your training even more will make the stave off the boredom that always comes with any training program.
i have an opinion that when training anything less than vertical is rarely helpful (aside from focusing on smearing technique). for someone who climbs regularly, a slab wall doesnt provide enough of a workout to promote gains. also, near vertical climbing technique and overhanging technique are very different. There is that fine line dividing when your pulling your hips in to keep as much weight as you can onto your feet and when your ass drops out below you, hanging most of the weight on your hands and all the feet are doing now is pushing you to the next hold while your core is trying desperately not to let you cut!
now, let me ask you something.... is there more near to vertical and slabby rock out there or hardcore mega roof overhangs? well... if you need a hint, gravity pulls on the rock too and the animals fight over caves for a reason! but i get it, well all love climbing the roofs i just want to encourage you to train all aspects of your climbing. plus endurance at a lower angle wont destroy your shoulders.

 .....so -5 to -35 degrees overhanging, i like it.... versatility. the static adjustment frame essentially has overhanging, while the angle changing frame has a range from near vertical to overhanging. point made!
side story recently there was a climbing Comp at my local gym and one of the young hard core brutes was all pissed because one of his routes wasnt on the sick hard overhanging wall. he wanted the little kids to climb the slab. news flash! climbing is climbing, be versatile, if you only train one thing thats all youll be good at, and you will find boredom every time you find yourself out of your element. overhanging lends it self to big pulls on big holds. no really technique gets developed here. i find it sad thats all this kid looks for in climbing. wheres that satisfying flow when every move is a big dynamic throw to the next roof jug?...did i get on that horse AGAIN?! compnee' dismount....
.....so -5 to -35 degrees overhanging, i like it.... versatility. the static adjustment frame essentially has overhanging, while the angle changing frame has a range from near vertical to overhanging. point made!the meat of the blog is coming now, i promise. i was talking with Garnet when i placed my order and the subject came around to the function of the angle changing frame and how it works. i had asked how easy it was to change the angle. see if you look at the picture there are hand cranks on either side...which is fine with me. a more complex design might utilize one crank but at that point the complexity can leading to more things that could go wrong. remember your climbing system and the SERENE mnemonic?
- S -- Solid -- Are all the pieces in the anchor solid?
- E -- Equalized -- Are all the pieces equalized?
- R -- Redundant -- Is there redundancy throughout the system?
- E -- Effective -- Was the anchor construction simple and quick with no fuss?
- NE -- No Extension -- Will the system be shock-loaded if a piece blows?
focus on Effective, simple because a more complex design is closer to failure that a simple effective one. ....entropy leads to chaos ...follow me. dog namit! im wordy today!!!
Garnet says to me that the angle adjusts quickly within each setting bolt position, but going from the full height to the lowest takes a little longer, around three minutes. he quickly promises me that its okay, no big deal and that one person can do it alone. ....im a little stalled, i remember looking at previous low quality photos trying to figure it all out so now im extra confused. he goes on to explain how the same fixed bolt settings that are on the standard frame are on the angle changing setup. the hand cranks adjust up and down from those positions. so you have to move things around a little to get it from -5 degrees to -35 degrees. he also sent me a picture about something else but i was able to get a good view of the cranks as well check it out!

the first picture shows the treadwall in the lowest position while the second shows us the highest position. clearly you can see the three bolt holes where the crank adjust its position. oddly enough though if you look closely you will notice in one picture the crank is on the inside and in the other its on the outside. WHY? well the first photo is from a customer the second is from the company, so my guess is the guy reversed how he assembled his wall.....oops!
but going back, that assembly error got me thinking (i like to tweak the patent), the bolt position and assembly changes the angle potential of the wall. so, could another bolting position be place the horizontal footing at the bottom. if so it would allow the wall to be made even steeper. my first problem solving thought is... would this then allow the wall to tip over? but i guess you could counter that by bolting it to the ground! well see when it gets here, either way im not likely to start customizing my wall right out of the gait.
.....anyway, i had a point when i started this post but now i lost my train of thought.... so, hope it was a good and informative read! im gonna make another volume today. so the next post should be more on that topic.
Subscribe to:
Posts (Atom)