~~~~~~~~~~~~~~~~~~~~~~~~~~~~~~~~~~~~~~~~~~~~~~~~~~~~~~~~~~~~~~~

the whole point of this blog is to help others with all the questions they have about setting up a similar home climbing gym, and ramble about a variety of climbing related subjects.
There is a variety of subjects... most involving rock climbing, written about on this blog. MAKING VOLUMES OR CLIMBING HOLDS, is probably one of the more popular subjects. just check the labels links or search bar to find your fancy.
of course if you want to go back and start from the beggining, please do! to that end, if there are any question let me know ... i encourage you to add comments for others to read or if you want to get me directly you can email me at treadwallproject@hotmail.com
IF THIS IS YOUR FIRST TIME, READ THE MUST READ LIST.... oh!, ...and you have to fight!
Showing posts with label Route Setting. Show all posts

Friday, January 28, 2011

hold address...


another issue i was continually struggling with when setting routes/problems on the treadwall was ...."where the hell am i on this wall?" i would be working through setting up a sequence, but had no idea how much actual space i had left to work with. sometimes, it would completely hose me because the wall would recycle and i could set myself up to continue on another way.

so i toyed with different ideas on how to fix my problem. obviously the easiest answer was to put origin markers on the wall in some way... so then i debated was it the feet of climbing i was concerned with or the individual panels.

i threw out the numbering the wall for climbing height for two reasons. first... as you see in the next picture i opted to get one of those distance counters, so i had no issue with needing to know how high ive gone. The second reason i ditched numbering for height was i wanted be able to plot holds on a map... and because the panels are six inches wide, who wants to have panel 20 & 20 1/2 .... and so on...


So then i was decided that i would number all the panels... i started
thinking of what would look best. (because im a little girl sometimes
about picking out the drapes.) but in the end it was too expensive for me to get a nice branding set, or have fancy number plaques made...


so i got those little mail box number stickers you see. each number cost 58 cents... boo. thus, it was gonna be far more expensive to invest in ugliness than i want to do, so rather than buying numbers for, every.. single.. panel. i decided to only number the first board and then count the rest out by fives.

i got a little paranoid that i was gonna mess this up so i stripped the wall (that was pre planned anyway) and put footholds on each panel i wanted to number. then in my obsessive nature i spun the wall around five or sixteen times to be sure i hadnt screwed it up.

.. then i threw on the stickers. the blue line obviously shows where the wall recycles and that came off ten seconds after i took the picture.

so, this now coupled with the setting map i made allows me to plan a general sequence then set with a matter of confidence. also, i can start setting a new route by first plotting what is currently set on the wall and then work out a sequence for a new route with out setting myself into a corner.


i guess many of you would never have this issue. but with setting, in general, every setter has painted themselves into a corner. and then you have to bight the bullet and realise the route just doesnt work and you cant force. as you get to be a better setter you come up with more tricks to avoid that. this is just a solution i have come up with.... hope it helps.

Monday, January 24, 2011

the perfect jug

F! i swear! this is my last post for the day... look kids i do the prep work and then put things together on my days off, so they come out like this. anyway, GARNET (BW insider), mentioned to me in an email (along with photos i cant blog about **jerk..cough**) that he likes my posts about holds.

so... i thought i would show off these little kids:


Some of you know i got into making holds because i didnt love all the new fads with hold design. too many shapers are making crap that either hurts, tweaks tendons, spins no matter how tight it is, would be awesome if it was left/right, would be awesome if the other side wasnt a jug, come in a set with #X of other useless holds, feels like poop, looks like poop, or oh hey ...yup that is poop! so i make my own... along with supporting the good shapers by still buying some. this shape was inspired by my perfect route idea.


this is a set of two holds. as mirror perfect as i could make them with my skills. you be the judge, i think if you look close you can find subtle differences but id wager your hands couldnt with your eyes closed. so... left and right specific, perfect jugging holds for endless mileage or just rockin you warm up and cool down. i even like them in the cave! not to bulky either! want a set? what color? make me an offer?


the perfect route


i like giving you images first and letting you thinking about where this is all going! any ideas?

(treadwall) - (assembly) + (colorful yet cryptic drawing) = ....blog post!

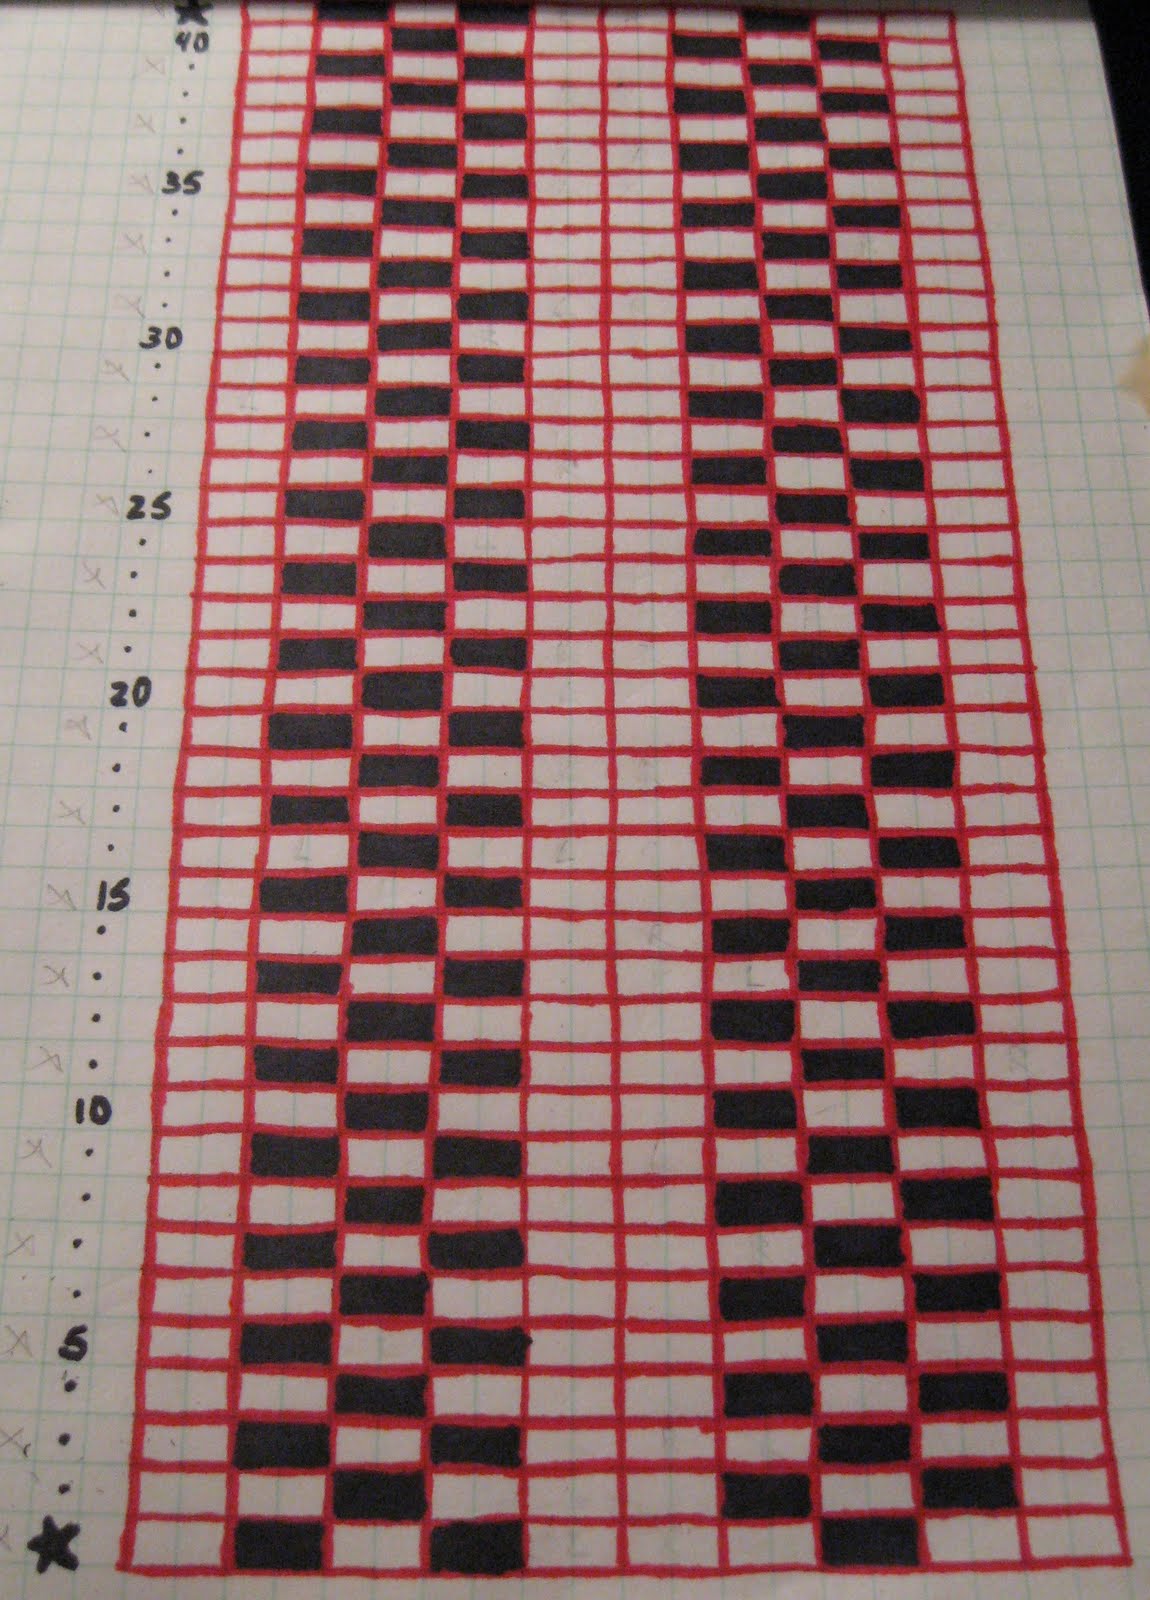
alright for awhile now i have been trying to make the perfect route for warming up and doing never ending mileage on the treadwall. i had some criteria for the route. i wont bore you with all those details so we can skip to the point. i wanted the route to have equal movement bilaterally for the body. often routesetters will unconsciously set routes to favor their strong side, be it left or right. the treadwall is a perfect medium for avoiding this failure.... or so i thought. that drawing above was the first map i made for the treadwall. it's crude, but it shows all the possible bolt positions in one rotation of the wall. i made it so i could plan out my perfect route as opposed to trying to due it freely on the route as i have done when i first got my treadwall set up.


here comes the bad part... im sorry brewer's ledge, but your wall has a flaw. it is impossible to set a route to have exactly mirrored movement for the hands and feet. not in their method of assembly anyway. after spending WAY TOO MUCH time on this problem i finally came up with one solution. i would take off half of the panels and reorder them so that the first 10ft of climbing was set opposite to second 10ft.

on the right here you see my second map.... i made this one on the computer... got tired of drawing, and now i can print out a new one if i need it. but by comparing the two maps you can see where i change the bolt pattern to allow for the setting of a perfect route. focus on panel lines 1&40 as well as 20&21. by making this adjustment i was able to set a route that recycles and is perfect to the micron... okay not that perfect but its as perfect as 1+1=2.

oh, little caveat i dont belief all treadwalls have this problem... i looked back through some of my archive photos and i think this bolt pattern is specific to the newer treadwalls. im not positive but i believe some older walls had a more standard grid bolt pattern (as opposed to the offset pattern found on my wall). if im wrong oh well...fixed my issues anyway. GARNET!? i know you read this bad boy... throw in a comment what do you think?! dont be shy... unless you might get fired? in which case, dude take care of your fam-damly!

these last two shots i put in a bunch of my own foot chips (yup! designed, molded, and poured in my house) on the re-ordered panels to help emphasize how the bolt placements are offset. the blue tape line show the gap between panels 1&40 by the way. lastly ill say, i like the offset pattern, it helps with being able to see where to put your feet. it doesnt stack the holds on top of each other too much. but the standard factory assembly instruction tweaked a bit works better for me. i said my piece, check out the last pics, comment if you have a pair!


RYOBI-TITAN


"...what the hell is this?" you might be thinking that right now. others of you might be way ahead of the game. but heres the deal. have you ever wanted to completely reset your wall but dread the thought of taking down a couple hundred holds first. i was a head routesetter once of a no-nothing gym and i know what a BI-OTCH! that can be. but i know how great it is to set on a white canvass too!

in the past i have seen other solutions to the problem. the main one is getting and appropriate size allen bit and putting it into the drill. but 99% of drills cant overcome the torque needed to remove a set holds. the next option i have seen is using a hammer/impact drill. this option sucks because the damn thing is loud and annoying! ever gone into a gym and seen multiple route setters up on the wall with hammer drills. sure they wear their ipods so they can stomach it. but what about me! well this option works great, both fast and relatively quiet! watch my demo videos if you need more convincing! try it out for yourself... post a comment and let the world know i may be crazy, but this one idea is genius!


this last video shows me setting a hold with the Ryobi-titan setup. i dont really recommend it as it is easy to cross thread a bolt that way, but it can be done. i still think a t-handle wrench is smarter. some "professional", "tradesman" (ha ha aha ha ha!) routesetters think that setting with a drill is faster and makes a better product. frankly i use the ten seconds turning a hold by hand to think about the route and looking around for options on where else the route might go. that thinking time helps me make a quality route. face it kids faster doesnt mean better, every climber has moved to quickly up a route only to find themselves off route... for some reason setters dont realize they can get off route too. Mkay, im done picking on others... sorry. hope this thing works for you though!


Wednesday, September 1, 2010

first flight

oh here are a couple pics from my first session. im sorry theyre not very good. basically the shed is too small to get really good angles. ill see what i can do to improve that!


after that i broke out all those holds ive been making! and did something i havent done for a year!


oh and check out my newest mega pinches!

Monday, July 19, 2010

four marking your territory....


this is kind of a funny topic for me.... and the rest of the Vulgarian climbing team. but i wont go into that here, the important part is..... you need tape to set a route! or you could memorize it. which is fine too.... i think thats dumb. but lets assume you are on the prowl for some brightly colored means of route making. well i have some choices for you. only one have i ever actually bought from so the rest will be unknown but you can give em a shot?


first up is IDENTI-TAPE. their tape is about as ghetto as their logo. i used these guys when i was the head setter at my gym... but they went down hill. unfortunately many people still buy from them because they are cheap as hell. but their tape wont always stick in cold or hot weather.... so i say boo. you are free to take your chances though.

next up is these guys... theyre slightly more expensive but i think ill give them a shot next. they tried to block me from stealing their logo...but as you can see i got it. i win you lose... where was i? oh yeah, hopefully it will be worth the extra 0.4o cents a roll.... and if not oh well.
UPDATE: got my shipment in today, looks like the good stuff

these dudes i know nothing and have nothing really to add.... oh except the selection sucks... other than that they are still cheaper than the $10 bucks a roll price that most places are sporting!

http://www.goodbuyguys.com/catalog/index.php/cPath/22_131


...and our final contestant is.....findtape(dot)com! yeah these guys have had deals on their pages but warn you, their site can be a little frustrating and annoying to navigate.
so my final words of advice are.... pay between $4-$7... never $10. you want 1" tape. tearing 2" tape down the middle all the time isnt worth it, and it makes your wall look CRAPPY! oh and when you buy a roll the standard to get is 60 yards.... dont get screwed buying a short roll. trust me it can happen.
remember im always here for questions and advice....even if your not asking... but, YOU SHOULD! comment please?
p.s. their is a fifth tape maker in this (post?)... but since ive tried and havent been able to figure out how to order from them i decided not to mention it... can you guess who it is?

Thursday, June 10, 2010

Routesetting and the Treadwall KORE

so recently i was on the phone with one of the long lost vulgarians .... he may not know it. but like it or not he is one of the vulgarians of western washington. come on guy?! you have a frig dedicated to malt liquire? ....judges ruling.....VULGARIAN!

moving on, so T.S. (as i like to call him) and i were chatting about my soon to be arriving
Treadwall KORE and we got around to route setting, as things often do with yours truly. since then i was think about the setting and decide i could share what ive scraped together so far on the topic. the pictures i have thus far are mostly stolen from the brewer's ledge site ....so all you really gain is my yammering on the topic.

Recap:
  • 280 t-nut placements on the treadwall
  • 20 ft of climbing before the wall recycles

Route Possibilities: (without repeating any hold, ie double taping)

  • 1~ 360ft mega pitch
  • 3~120ft trad length pitches
  • 9~40ft gym sport climb length pitches
  • 18~20ft boulder problems

thats the basic breakdown. obviously you could reinvent the pitch lengths but this way its in easy to understand numbers. remember the best part about the treadwall is you can easily reset the wall any time you want. ...k, this is info i easily gleamed off the BL web page, then i hit the message boards.... cause whats a guy to do when he works grave shift and is up all night.. and the people posting who had their own tread walls all had their own methods of setting and tracking routes. but mostly they were variations on the them i am gonna bust out now. the set up..............

here's your wall, all ready to go for mega-enduro-thons. holds in bucket ready to set ..check! route tape?... yeah this can be any tape really, if it sticks...dont get me started on tape that dont stick. but in 20ft your gonna need a new color when the wall recycles. so get 8 or 10 colors and then plan on doing designs. ie stacking tape color together....dots, stripes whatever you wanna go with. but youll need a system and a legend. lets see what BL has going.

sorry these pictures arent bigger but it will help make my point....assuming you have at least the same amount of imagination that Stephenie Meyers had to think up the "Twilight" series. (vampires dont sparkle in the sun and have blissful love with tweenage virgins.... they have dark heart, they eat virgins, burn in the sun and go to HELL!)...i digress.

so in this example basically what the setter has done is set all boulder problems, then they link combinations of those problems to form routes of varying difficult. this appears to be the least difficult method to set. you can double tape holds with out getting to confusing and all you need to do is either remember the order for climbing or post you legend close enough to see from the wall.

but lets say you didnt want to have a legend.... well one guy from god knows where suggested i just memorize the route. he apparently with an elephantine memory uses no tape at all. i guess he didnt want the tape residue on his panels.... well i dont have an elephantine memory.... in fact all i have is an elephantine ass, so i will be use tape.

another gentleman, or it could have been a female (i didnt check the plumbin), suggested having a regular system for progression. i personally like this idea. she (i like the idea that i may have talk to a girl)...she said she use a base color for the route, then puts on a stripe for every lap after the first. she also used ROYGBIV to keep the progression simple.

in case you didnt know ROYGBIV in a mnemonic memory device for keeping the colors of the visible spectrum straight. Red, Orange, Yellow, Green, Blue, Indigo, Violet... say it like roy-g-biv. so anyway she picks her base then does a lap on base color then base plus a stripe of the next on in the spectrum.... looping around after violet. i think this may be what i go for when my wall gets here. it seems logical and simple. but if your still confused ill break it down once more

  • lap 1~Base color only BLUE
  • lap 2~blue with purple stripe (im not sure there are a lot of choices for indigo and violet)
  • lap 3~blue with red stripe
  • lap 4~blue with orange stripe
  • lap 5~blue with yellow stripe
  • lap 6~blue with green stripe

now right there you have a six laps.... a 120ft long pitch. but if you want to go longer you could easily add other colors in, white, black or those god awful neon colors for example.

so you get to have essentially to have at least 8 routes or boulder problems and your system stays relatively clear. you will likely mess up the colors at some point for example grabbing a red on green hold when you meant to go for green on red, but no system is perfect. i guess if your color blind your shit-outta-luck! if anyone has anything else to add go for!

Friday, May 7, 2010

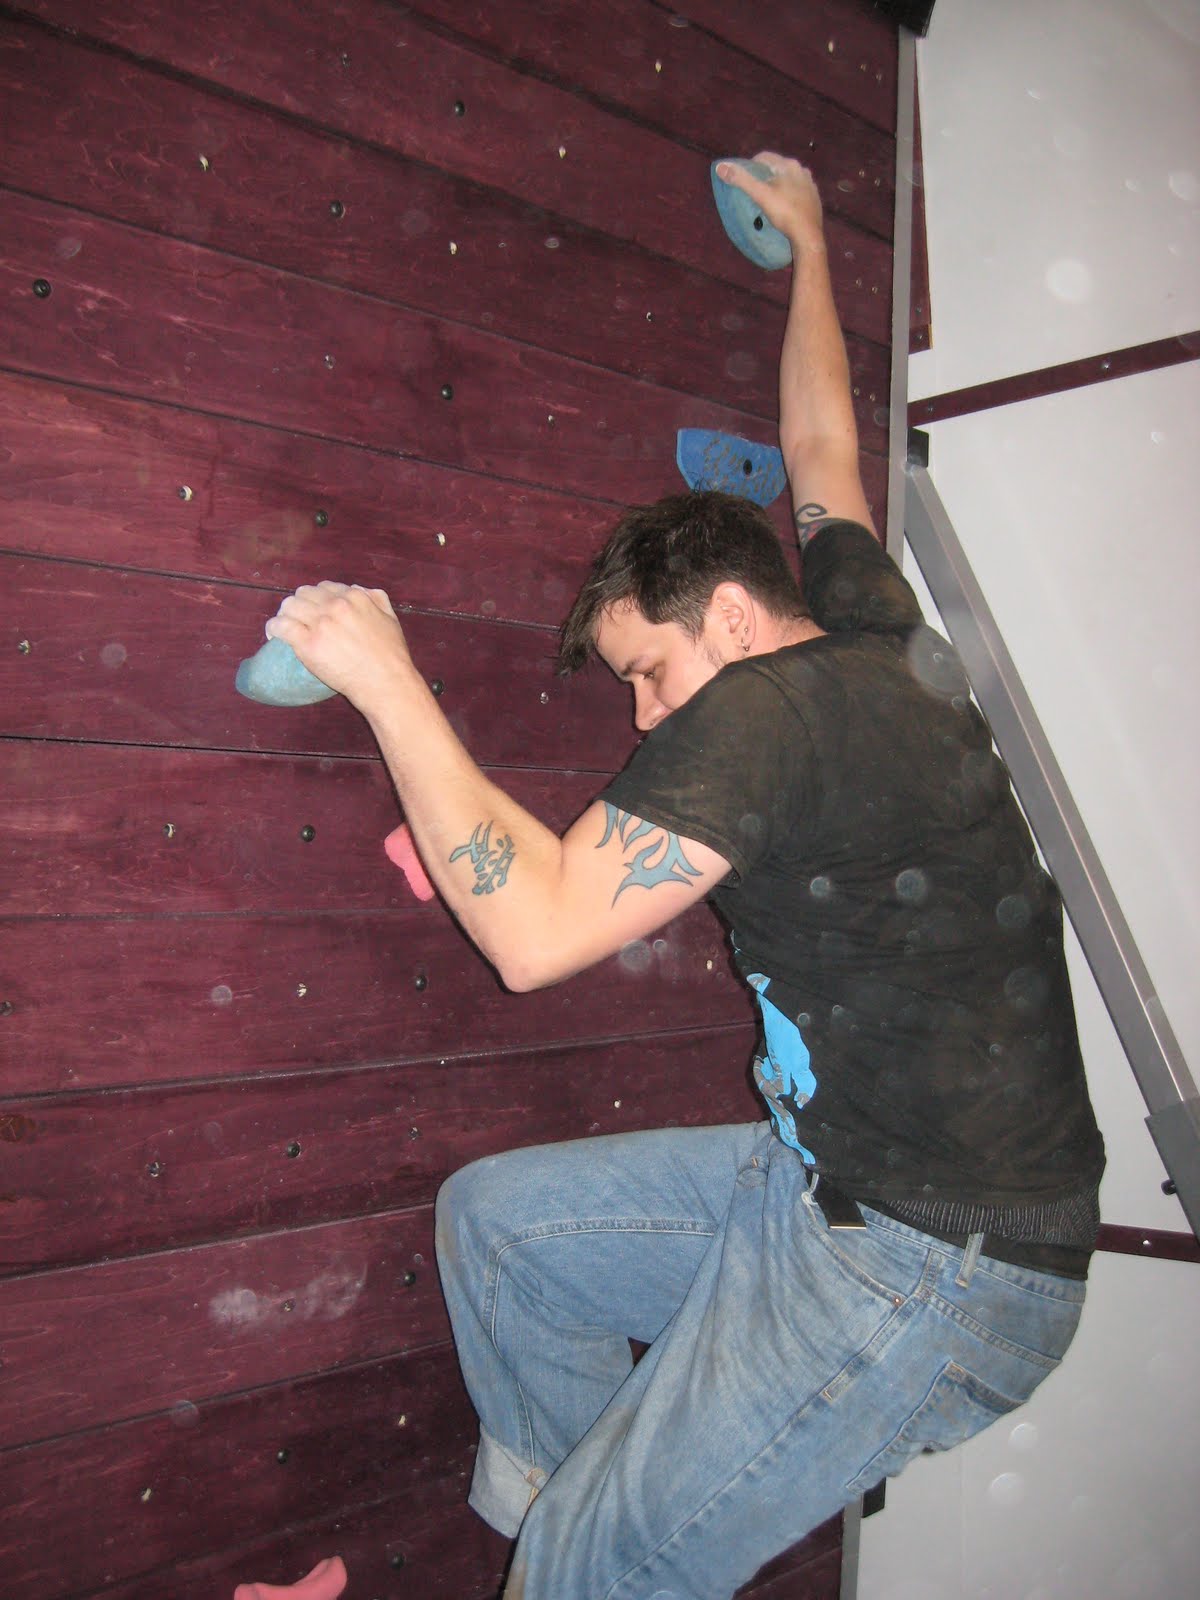
Routesetting

well i have made some serious claims with regard to my history and thus my credibility. i told you i was a routesetter and all, but i never gave ya any proof. so, just so you know here i am, putting up to holds. i guess this is only proof that i once self belayed myself on a gri-gri with route tape, a wire brush, and a aid ladder hanging from my harness ...with the laziest mohawk ever. of course you dont have to be such a cynic